
Deep Water Culture (DWC) for Beginners: The Ultimate Guide
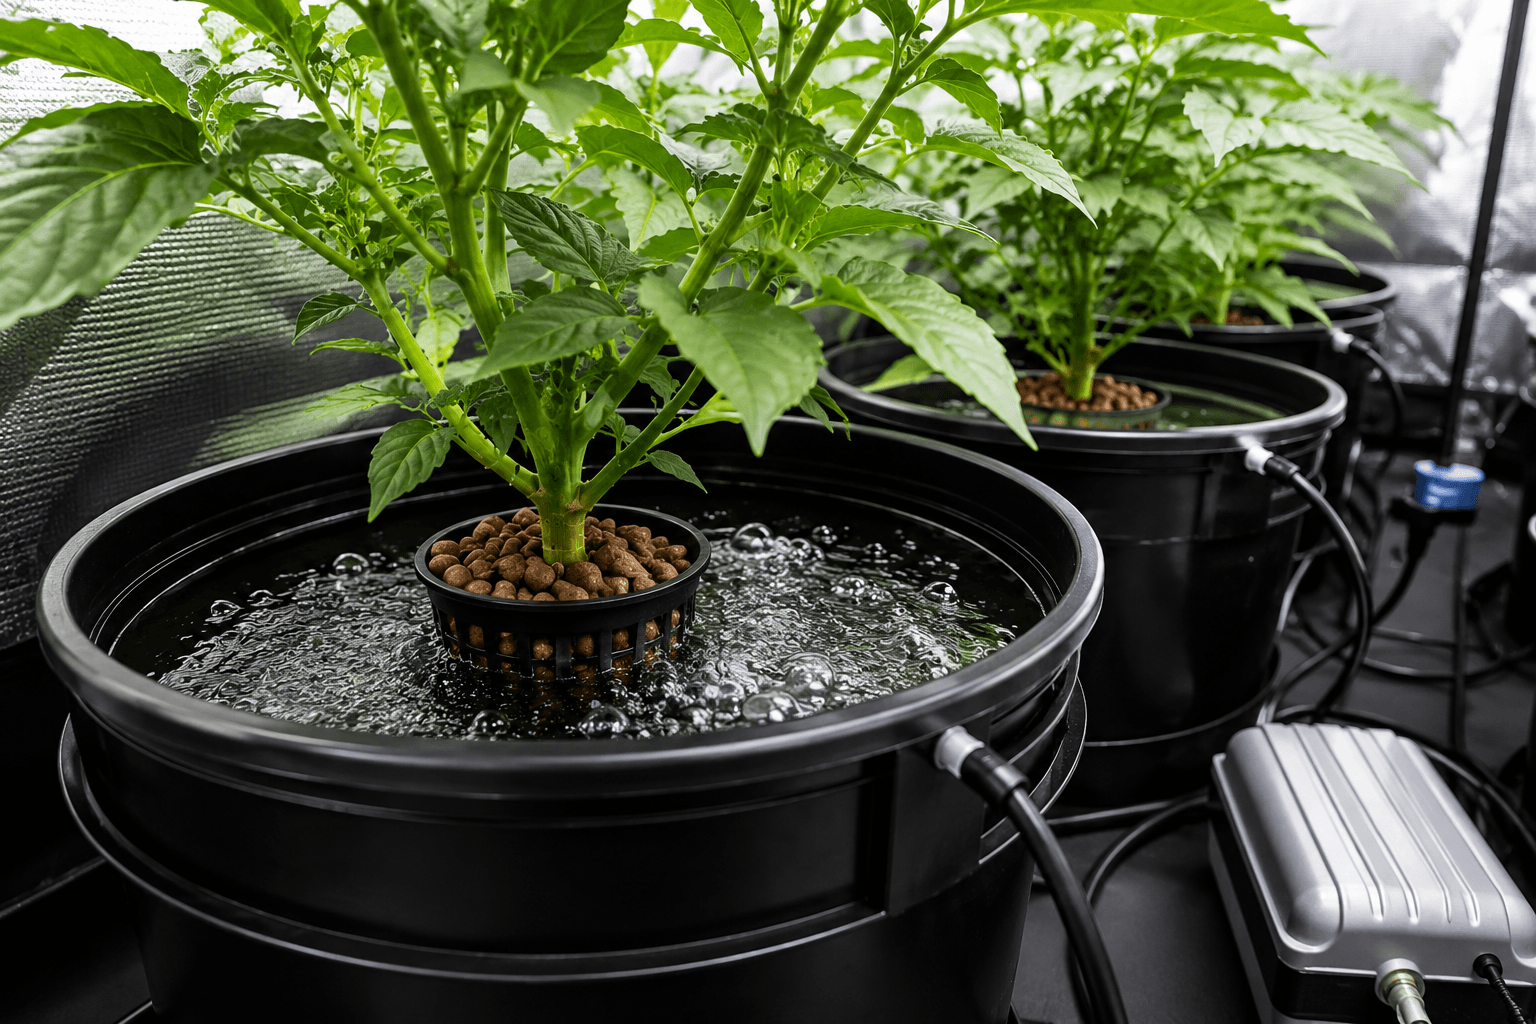
Deep Water Culture (DWC) is the most accessible and forgiving hydroponic system for beginners who want to grow their own food at home. With just a bucket, an air pump, and a net pot, you can build a system that grows tomatoes, lettuce, peppers, and herbs faster and more productively than any soil garden. DWC is the system we recommend most frequently at The Hydro Lab for first-time hydroponic growers because it combines simplicity with a wide margin for error, giving beginners the room to learn without losing their plants to every mistake.
The fundamental principle of DWC is elegantly simple. Plant roots hang directly into a reservoir of nutrient-rich water. An air pump continuously forces oxygen into the water through an air stone, creating a highly oxygenated environment that promotes rapid root growth and nutrient absorption. Unlike soil, where roots must search for water and nutrients, DWC delivers everything directly to the root zone, allowing plants to dedicate more energy to above-ground growth. The result is faster growth, larger yields, and healthier plants that can produce food year-round regardless of outdoor conditions.
This guide covers everything you need to know to build, operate, and maintain a DWC system as a beginner. We have tested dozens of configurations, nutrient formulations, and crop varieties at The Hydro Lab over the past five years, and we have distilled that experience into a practical, step-by-step approach that will take you from complete novice to confident DWC grower. Whether you have a sunny windowsill, a heated garage, or a dedicated grow tent, DWC can be adapted to your space and your goals.
The Lab's Verdict
Deep Water Culture is the single best hydroponic system for beginners. No other system offers the same combination of low cost, simple construction, forgiving operation, and impressive results. A well-built DWC system can produce a first harvest of lettuce or herbs within four weeks of planting, and the skills you learn maintaining a DWC system transfer directly to more advanced hydroponic methods. Start with DWC, master the fundamentals, and then expand into other systems as your confidence and curiosity grow. Your first DWC bucket will teach you more about hydroponics than reading a hundred articles.
What Is Deep Water Culture and How Does It Work?
Deep Water Culture is a hydroponic growing method in which plant roots are suspended directly in a nutrient solution while an air pump continuously oxygenates the water. The name describes exactly what the system does: the roots are cultured in deep water. Unlike soil, where roots must grow through a solid medium to find water, nutrients, and air, DWC delivers all three essential resources directly to the root zone in a liquid medium. The key innovation that makes DWC work is forced aeration. Without continuous oxygenation, submerged plant roots would suffocate and rot within days. The air pump and air stone keep dissolved oxygen levels high enough to support vigorous root respiration and prevent the growth of anaerobic pathogens.
The science behind DWC is rooted in plant physiology. Plant roots require oxygen for cellular respiration, the process that generates the energy needed for nutrient uptake and growth. In soil, oxygen is available in the pore spaces between soil particles, typically at concentrations of 10 to 21 percent. In water, oxygen is dissolved at much lower concentrations, typically 6 to 9 parts per million at saturation depending on temperature. The air pump in a DWC system continuously injects atmospheric air into the water, creating bubbles that increase the surface area for oxygen diffusion and maintaining dissolved oxygen levels at or near saturation. The constant aeration also creates water movement that prevents the formation of stagnant zones where pathogens could establish.
The growth advantage of DWC over soil is dramatic. Plants in a well-managed DWC system typically grow 30 to 50 percent faster than equivalent plants in high-quality soil. The reason is that DWC eliminates the energy expenditure that roots must make in soil to search for water and nutrients. In soil, roots must grow through the medium, excreting enzymes to break down organic matter and competing with soil microbes for available nutrients. In DWC, the nutrient solution is formulated to contain all essential elements in precisely balanced, immediately available forms. The roots can absorb what they need without any intermediate processing, allowing the plant to divert more energy to leaf, stem, and fruit production.
How DWC Differs from Other Hydroponic Systems
DWC is unique among hydroponic systems because the roots are fully submerged at all times. NFT uses a thin film of water that flows over exposed roots. Aeroponics mists roots in open air. Ebb and flow periodically floods and drains the root zone. Only DWC keeps roots continuously immersed in a deep reservoir of oxygenated water. This design gives DWC its characteristic stability because the large water volume buffers pH, EC, and temperature fluctuations that would be problematic in other systems.
Complete DWC Parts List and Shopping Guide
Building a DWC system requires surprisingly few components, and most of them are available at any hardware store, pet supply store, or online retailer. The simplicity of the parts list is one of the main reasons DWC is recommended for beginners. There are no complex plumbing connections, no solenoid valves, no timers, and no high-pressure pumps. The entire system can be assembled in under an hour with basic hand tools.
For a single-plant DWC bucket, you need a 5-gallon food-grade bucket with a lid, a 4-inch net pot, a 2-inch by 2-inch air stone, an air pump rated for at least 20 liters per minute, 4 feet of airline tubing, and growing medium such as clay pebbles or hydroton. The total cost for a single bucket system ranges from $40 to $70 depending on the quality of the air pump and the source of the bucket. Spending more on the air pump is always a good investment because diaphragm pumps lose output over time, and an undersized pump is the most common cause of DWC failures.
For a multi-plant system, you can either use individual buckets or a single larger reservoir such as a 17-gallon tote. Individual buckets offer the advantage of modularity. If one plant develops root rot or a nutrient deficiency, it can be isolated and treated without affecting the other plants. Single-reservoir systems are more efficient for water and nutrient management because there is only one reservoir to test and adjust. The choice between individual buckets and a single reservoir depends on whether you prioritize disease isolation or management simplicity.
| Component | Specification | Estimated Cost | Notes |
|---|---|---|---|
| Bucket or Tote | 5-gallon food-grade, opaque | $8-$15 | Avoid clear buckets; light causes algae |
| Net Pot | 4-inch or 6-inch diameter | $2-$5 | Larger pots support bigger plants |
| Air Pump | 20-40 L/min, dual outlet | $15-$35 | Oversize by 2x for reliability |
| Air Stone | 2-inch cylindrical or disc | $3-$8 | Replace every 2-3 months |
| Airline Tubing | 1/4-inch or 3/8-inch | $3-$6 | Use black tubing to prevent algae |
| Growing Medium | Hydroton clay pebbles | $10-$20 | Rinse thoroughly before use |
| Nutrient Solution | 3-part hydroponic nutrients | $25-$40 | Lasts 2-3 months for 1 bucket |
| pH Test Kit | Digital meter or liquid drops | $10-$25 | Digital is more accurate |
| EC Meter | TDS or EC pen | $12-$30 | Essential for nutrient management |
| Total (Single Bucket) | Complete setup | $70-$130 | One-time investment, reusable for years |
Step-by-Step DWC Setup Guide
Setting up your first DWC system is a straightforward process that takes approximately one hour. The following steps have been refined through dozens of builds at The Hydro Lab and represent the most reliable method for achieving a leak-free, properly aerated system on the first attempt. Read through all steps before beginning to ensure you have all materials and tools ready.
Step 1: Prepare the Bucket Lid
Using a hole saw or jigsaw, cut a 4-inch diameter hole in the bucket lid for the net pot. Position the hole off-center to leave room for airline tubing and a fill hole on the opposite side. Sand the edges of the cut hole smooth to prevent the net pot from catching on rough plastic. Drill a small 1/4-inch hole next to the net pot hole for the airline tubing to pass through. Drill a second 1/4-inch hole for a fill port that can be used to add water without removing the lid. Clean all plastic shavings thoroughly before proceeding.
Step 2: Install the Air Stone and Tubing
Connect the airline tubing to the air pump outlet and run it through the small hole in the bucket lid. Attach the air stone to the end of the tubing inside the bucket. Place the air stone at the bottom center of the bucket, then fill the bucket with water to test the aeration system. You should see a steady stream of fine bubbles rising from the entire surface of the air stone. If bubbles are large and irregular, the air stone may be clogged or the pump may be undersized. Adjust pump placement so that the airline has no kinks or sharp bends that could restrict airflow.
Step 3: Prepare the Nutrient Solution
Fill the bucket with water to within 1 inch of the bottom of the net pot when the lid is closed. The water level should be high enough that the roots will reach the water within a few days of planting but low enough that there is an air gap between the water surface and the net pot bottom. Add nutrients according to the manufacturer's instructions for the seedling or vegetative stage of your crop. Typical starting EC for leafy greens is 0.8 to 1.2 millisiemens per centimeter, and for fruiting plants it is 1.2 to 1.8 millisiemens per centimeter. Adjust pH to 5.8 using pH up or pH down solution. Allow the system to circulate for 30 minutes, then retest pH and EC and adjust as needed.
Step 4: Prepare and Plant Seedlings
Start seeds in rockwool cubes or rapid rooter plugs in a separate propagation tray with a humidity dome. Maintain temperatures at 22 to 26 degrees Celsius and provide 18 hours of light per day at a PPFD of 150 to 200 micromoles per square meter per second. After 10 to 14 days, when seedlings have developed their first true leaves and a root system that extends beyond the starter plug, they are ready for transplant. Rinse the hydroton clay pebbles thoroughly to remove dust. Place the seedling in the net pot and fill around it with clay pebbles, being careful not to damage the stem or roots. Gently lower the net pot into the bucket lid until it is seated securely.
Step 5: Configure Lighting and Environment
Position your grow light 12 to 18 inches above the plant canopy. For leafy greens, maintain a PPFD of 250 to 350 micromoles per square meter per second. For fruiting plants, increase to 400 to 600 micromoles. Maintain an 18-hour photoperiod for vegetative growth and switch to 12 hours for flowering when growing fruiting plants. Air temperature should be 22 to 26 degrees Celsius during the day and 18 to 20 degrees Celsius at night. Relative humidity should be 60 to 70 percent during vegetative growth and 50 to 60 percent during flowering. Water temperature must be maintained below 24 degrees Celsius, ideally between 18 and 22 degrees Celsius, to prevent root rot and maintain optimal dissolved oxygen levels.
Nutrient Management for DWC Systems
Nutrient management is the skill that most determines success or failure in DWC. Unlike soil, where organic matter and soil microbes provide a buffer against nutrient imbalances, hydroponic nutrients are the sole source of all essential elements for plant growth. The grower must maintain the correct concentration and balance of nutrients in the solution at all times, and this requires regular monitoring and adjustment. The two key measurements are pH and EC, and understanding how to manage both is essential for DWC success.
pH measures the acidity or alkalinity of the nutrient solution. In DWC, the optimal pH range is 5.5 to 6.5, with 5.8 being the ideal target for most crops. At pH 5.8, all essential nutrients are available for plant uptake. Below pH 5.5, micronutrients like iron and manganese become too available and can reach toxic levels. Above pH 6.5, iron, phosphorus, and manganese become less available, leading to deficiency symptoms even though the nutrients are present in the solution. pH should be checked daily and adjusted using pH up or pH down solutions. Do not use vinegar or lemon juice as pH adjusters because they break down rapidly and cause pH instability.
EC, or electrical conductivity, measures the total concentration of dissolved nutrients in the solution. EC is measured in millisiemens per centimeter or microsiemens per centimeter. Different crops and different growth stages require different EC levels. Seedlings and young plants need lower EC because their root systems are not fully developed and they are more sensitive to nutrient strength. Mature plants with large root systems can handle higher EC levels. A general rule is to increase EC by 0.2 to 0.3 millisiemens per centimeter at each growth stage transition. The following table shows recommended EC ranges for common DWC crops.
| Crop | Seedling EC | Vegetative EC | Flowering/Fruiting EC | Target pH |
|---|---|---|---|---|
| Lettuce | 0.6-0.8 | 0.8-1.2 | 1.0-1.4 | 5.8-6.2 |
| Basil | 0.8-1.0 | 1.0-1.4 | 1.2-1.6 | 5.5-6.0 |
| Tomatoes | 0.8-1.0 | 1.2-1.8 | 1.8-2.4 | 5.8-6.3 |
| Peppers | 0.8-1.0 | 1.2-1.6 | 1.6-2.2 | 5.8-6.2 |
| Cucumbers | 0.8-1.0 | 1.2-1.8 | 1.8-2.4 | 5.8-6.0 |
| Strawberries | 0.6-0.8 | 0.8-1.2 | 1.2-1.6 | 5.5-6.0 |
| Herbs (mint, cilantro) | 0.6-0.8 | 0.8-1.2 | 1.0-1.4 | 5.8-6.2 |
A common beginner mistake is to add nutrients every time EC drops. This is incorrect. When plants absorb water and nutrients, EC can either rise or fall depending on the relative uptake rates. If EC is rising, the plants are drinking more water than they are consuming nutrients, and you should add plain pH-adjusted water rather than nutrients. If EC is falling, the plants are consuming nutrients faster than water, and you should add nutrient solution. The goal is to maintain EC within the target range, not to hold it at a fixed number. Understanding this distinction is the most important nutrient management skill you will develop.
Common DWC Problems and How to Solve Them
Even experienced growers encounter problems in DWC systems, and knowing how to diagnose and resolve issues quickly is the difference between a successful harvest and a disappointing one. The most common DWC problems fall into four categories: root health issues, nutrient imbalances, environmental stress, and equipment failures. Each category has distinct symptoms that can be identified through regular observation and testing.
Root rot, caused by Pythium pathogens, is the most feared DWC problem. The first symptom is a slight browning of the root tips, which progresses to slimy, brown, foul-smelling roots over several days. The primary cause is water temperature above 24 degrees Celsius, which reduces dissolved oxygen and creates favorable conditions for Pythium growth. Prevention is the best strategy: maintain water temperature between 18 and 22 degrees Celsius using a water chiller if necessary, ensure adequate aeration with an oversized air pump, and use beneficial bacteria products like Hydroguard or Bacillius amyloliquefaciens as a preventive measure. If root rot is detected early, remove affected roots, clean the bucket and air stone, replace the nutrient solution, and add a hydrogen peroxide treatment at a concentration of 3 milliliters per liter of 3 percent hydrogen peroxide.
Nutrient deficiencies are the second most common problem category. Yellowing lower leaves typically indicate nitrogen deficiency, which is corrected by increasing the EC of the nutrient solution. Interveinal chlorosis, where the leaf veins remain green but the tissue between them turns yellow, indicates iron deficiency, which is usually caused by pH being too high rather than insufficient iron in the solution. Check pH first when you see deficiency symptoms, because pH outside the optimal range of 5.5 to 6.5 can lock out multiple nutrients simultaneously. If pH is correct and deficiencies persist, switch to a fresh batch of nutrient solution, as nutrient ratios can become unbalanced over time as plants selectively absorb different elements.
Algae growth in the reservoir is a common issue that signals light leakage into the nutrient solution. Algae compete with plant roots for oxygen and nutrients, and algae die-off can release toxins that stress plants. Prevention requires ensuring that the bucket and lid are completely light-proof. Use opaque buckets, seal any gaps around the net pot with aluminum foil or light-proof tape, and cover the hydroton surface with a light-proof disc or additional clay pebbles. If algae has already established, perform a complete system clean, replace all water and nutrients, and address the light leak that caused the problem.
DWC Pros: Why Beginners Love It
- + Simple construction with minimal tools
- + Low initial investment under $100
- + Forgiving pH and EC stability
- + Power outage tolerant up to 12 hours
- + Excellent for large fruiting plants
- + Fast growth compared to soil
- + Low component count means fewer failures
DWC Cons: What to Watch Out For
- - Heavy buckets are difficult to move when full
- - Water temperature must stay below 24C
- - Root rot risk if oxygenation is inadequate
- - High water and nutrient consumption
- - Water changes are physically demanding
- - Not space efficient for leafy greens
- - Difficult to clean and sterilize between cycles
DWC Maintenance Schedule and Best Practices
Consistent maintenance is the foundation of DWC success. Unlike soil gardens, where plants can survive weeks of neglect, hydroponic systems require daily attention because the plants depend entirely on the grower for water, nutrients, and oxygen. However, DWC is one of the least demanding hydroponic systems in terms of daily maintenance complexity. The following schedule has been developed at The Hydro Lab through years of testing and represents the minimum maintenance needed for healthy, productive DWC plants.
Daily Maintenance Checklist
- Check Water Level: Top off with pH-adjusted water if the level has dropped more than 1 inch from the fill line. Use plain water, not nutrient solution, unless EC is also low.
- Measure pH: Target 5.8. Adjust if outside 5.5-6.5 range using pH up or pH down solution. Record the reading in a log for trend analysis.
- Measure EC: Compare to the target range for your crop and growth stage. Rising EC means add water. Falling EC means add nutrients.
- Check Water Temperature: Must be below 24 degrees Celsius. If above, add frozen water bottles or reduce grow room temperature.
- Inspect Roots: They should be white or cream-colored, firm, and healthy-smelling. Brown or slimy roots indicate the beginning of root rot.
- Visual Plant Check: Look for yellowing, spotting, wilting, or unusual growth patterns. Early detection of problems dramatically improves treatment success.
Weekly and Biweekly Tasks
- Weekly: Clean the air stone by scrubbing gently with a soft brush under running water to remove mineral deposits. Replace if bubble output has decreased noticeably. Clean the bucket walls with a soft sponge if algae or mineral buildup is visible.
- Biweekly: Perform a full reservoir change. Remove the plant and net pot, empty the bucket completely, scrub all interior surfaces with a 3 percent hydrogen peroxide solution, rinse thoroughly, and refill with fresh nutrient solution. This prevents the buildup of pathogen spores, mineral precipitates, and root exudates that can inhibit plant growth.
- Monthly: Replace the air stone with a new one. Clean the air pump intake filter if it has one. Calibrate your pH meter using pH 4.0 and pH 7.0 calibration solutions. Check EC meter accuracy against a calibration standard if available.
- Between Cycles: After each harvest, disassemble the entire system, soak all components in a 10 percent bleach solution for 30 minutes, rinse thoroughly, and air dry completely before storing or rebuilding. This sterilization step prevents pathogen carryover between crop cycles.
Best Crops for DWC Beginners
Choosing the right first crop for your DWC system is critical for building confidence and experiencing success. Some plants are naturally more forgiving in hydroponic systems, while others require precise environmental control and nutrient management that can frustrate beginners. Based on our testing at The Hydro Lab, the following crops are ranked by how well they perform in DWC and how suitable they are for first-time growers.
Lettuce is the ideal first DWC crop. It grows quickly, has a short time to harvest of 30 to 40 days from transplant, and is extremely tolerant of pH and EC fluctuations. Butterhead and romaine varieties perform particularly well in DWC, producing large, crisp heads with excellent flavor. Lettuce also has a compact root system that does not require large buckets, making it perfect for 3 to 5 gallon systems. The low light requirements of lettuce, approximately 250 to 300 PPFD, mean that even modest grow lights can produce excellent results.
Basil is the second best beginner crop and arguably the most rewarding. Genovese basil in DWC grows almost twice as fast as soil-grown basil and produces exceptionally aromatic leaves with higher essential oil content. Basil thrives in the same pH and EC range as lettuce, making it easy to grow alongside leafy greens. The main challenge with basil is that it requires more light, approximately 350 to 400 PPFD, and it benefits from regular pruning to prevent flowering. Once basil flowers, the leaf quality declines and the plant shifts energy to seed production instead of vegetative growth.
For growers who want to progress to fruiting crops, cherry tomatoes are the best first choice. They are more forgiving than large-fruited tomatoes and produce abundant yields even with minor environmental fluctuations. Choose determinate or dwarf varieties that naturally stop growing at a manageable height. Sungold, Sweet 100, and Tiny Tim are excellent DWC varieties. Cherry tomatoes require higher EC levels of 1.8 to 2.4, more light at 400 to 500 PPFD, and support structures such as tomato cages or trellises. The reward for this additional effort is a continuous harvest of sweet, flavorful tomatoes for several months.
Beginner Crop Recommendations
- Beginner Level 1: Lettuce (butterhead, romaine), basil (Genovese), cilantro, mint, kale, Swiss chard.
- Beginner Level 2: Spinach, arugula, dill, parsley, oregano, thyme, strawberries (day-neutral).
- Intermediate: Cherry tomatoes, bell peppers, jalapeno peppers, cucumbers, bok choy, chard.
- Advanced: Beefsteak tomatoes, eggplant, melons, winter squash, tomatillos, hot peppers (superhots).
Frequently Asked Questions About DWC for Beginners
How often should I change the water in my DWC system?
Change the water every two weeks for optimal plant health. If you are growing a short-cycle crop like lettuce, one water change mid-cycle is sufficient. For long-cycle crops like tomatoes, change every two weeks without fail. The water change prevents mineral buildup, pathogen proliferation, and nutrient imbalances that develop as plants selectively absorb different elements.
What water should I use for DWC?
Use reverse osmosis or distilled water for the most predictable results. Tap water can be used if it has low chlorine and total dissolved solids below 200 parts per million. If using tap water, let it sit in an open container for 24 hours to allow chlorine to evaporate, or use a dechlorinating filter. Well water should be tested for mineral content before use.
Do I need a water chiller for DWC?
A water chiller is recommended if your grow room temperature regularly exceeds 24 degrees Celsius or if you are growing in a warm climate without air conditioning. DWC water temperature must stay below 24 degrees Celsius to prevent root rot. If your ambient temperature is consistently below 22 degrees Celsius, a chiller is not necessary. Frozen water bottles placed in the reservoir can provide emergency cooling.
How do I prevent root rot in DWC?
Root rot prevention has three pillars: maintain water temperature below 24 degrees Celsius, ensure adequate aeration with an oversized air pump, and use beneficial bacteria products like Bacillus amyloliquefaciens. Also, keep the system completely light-proof to prevent algae growth, which creates conditions favorable for Pythium. Inspect roots daily so you can catch problems early.
Can I grow multiple plants in one DWC bucket?
For leafy greens like lettuce, you can grow 2 to 3 plants in a single 5-gallon bucket by adding additional net pot holes in the lid. For fruiting plants like tomatoes, peppers, or cucumbers, grow only one plant per 5-gallon bucket. Crowding multiple heavy-feeding plants in one bucket leads to root competition and reduced yields for all plants.
What is the ideal air pump size for a DWC bucket?
For a single 5-gallon DWC bucket, use an air pump rated for at least 20 liters per minute with a single outlet. For 2 to 4 buckets, use a dual-outlet pump rated for 40 to 60 liters per minute with a manifold splitter. Always oversize your air pump by at least 50 percent because pump output decreases as diaphragms wear and back pressure from air stones increases.
How often should I check pH and EC?
Check pH and EC daily during the first two weeks of each growth cycle to understand how your specific setup behaves. Once you understand the pattern, you can reduce to every other day for most crops. During peak fruiting, daily checks are recommended because mature plants consume water and nutrients rapidly and can cause rapid pH swings.
Which DWC Setup Matches Your Goals?
DWC is adaptable to any space and any budget. Choose the configuration that fits your lifestyle, and you will be harvesting fresh produce within weeks.
The Windowsill Grower
You have a sunny windowsill and want fresh herbs and lettuce for your kitchen. Budget is minimal and space is tight. Start with one 3-gallon bucket.
The Salad Producer
You want a steady supply of lettuce and greens for your family. A grow tent in the basement or spare room provides controlled conditions year-round.
The Year-Round Farmer
You want tomatoes, peppers, and cucumbers every season. A dedicated grow room with water chiller and environmental control is your long-term investment.
The Lab's Final Analysis
Deep Water Culture is not just a beginner hydroponic system. It is a legitimate, high-performance growing method that can produce results competitive with any other hydroponic system when properly managed. The reputation of DWC as a beginner system comes from its simplicity and forgiveness, not from any limitation in its potential. At The Hydro Lab, our DWC buckets regularly produce tomato plants reaching two meters in height and yielding over three kilograms of fruit per plant. Our DWC lettuce matches the quality of any NFT system, and our DWC basil production has won taste tests against soil-grown competitors.
The key insight that separates successful DWC growers from frustrated ones is attention to water temperature. Every DWC problem, from root rot to nutrient deficiencies to slow growth, can be traced back to water temperature that is too high. Invest in a water chiller if your grow room runs warm, or place your DWC buckets in the coolest part of your growing space. A simple aquarium thermometer is the most important monitoring tool in your DWC setup. Keep the water between 18 and 22 degrees Celsius, and you will avoid ninety percent of the problems that plague DWC beginners.
The second most important factor is consistency. Check your system daily, log your pH and EC readings, and respond to trends before they become problems. A DWC system that is checked and adjusted daily will produce abundant harvests with minimal waste. A DWC system that is ignored for three days can develop root rot, pH lockout, or nutrient imbalances that take weeks to correct. The daily five-minute check is the single most important habit you can develop as a DWC grower.
We encourage every new grower to start with one or two DWC buckets and focus on mastering the fundamentals before scaling up. Grow lettuce and basil for your first two cycles. Learn how pH and EC behave in your specific water and environment. Learn what healthy roots look like and how they smell. Learn how your plants respond to temperature changes and light adjustments. These lessons are the foundation of all hydroponic growing, and DWC teaches them better than any other system because the feedback loops are clear and direct.
Your first DWC harvest will be the most satisfying meal you have ever grown. The taste of a tomato that went from seed to plate in your own home, grown in water with your own hands, is an experience that changes how you think about food. Build your first bucket this weekend. Start with a lettuce seedling or basil cutting. Check the pH every day. Keep the water cool. Within a month, you will be a hydroponic grower, and within a year, you will wonder why you ever grew any other way.
More from Systems & DIY
Keep reading
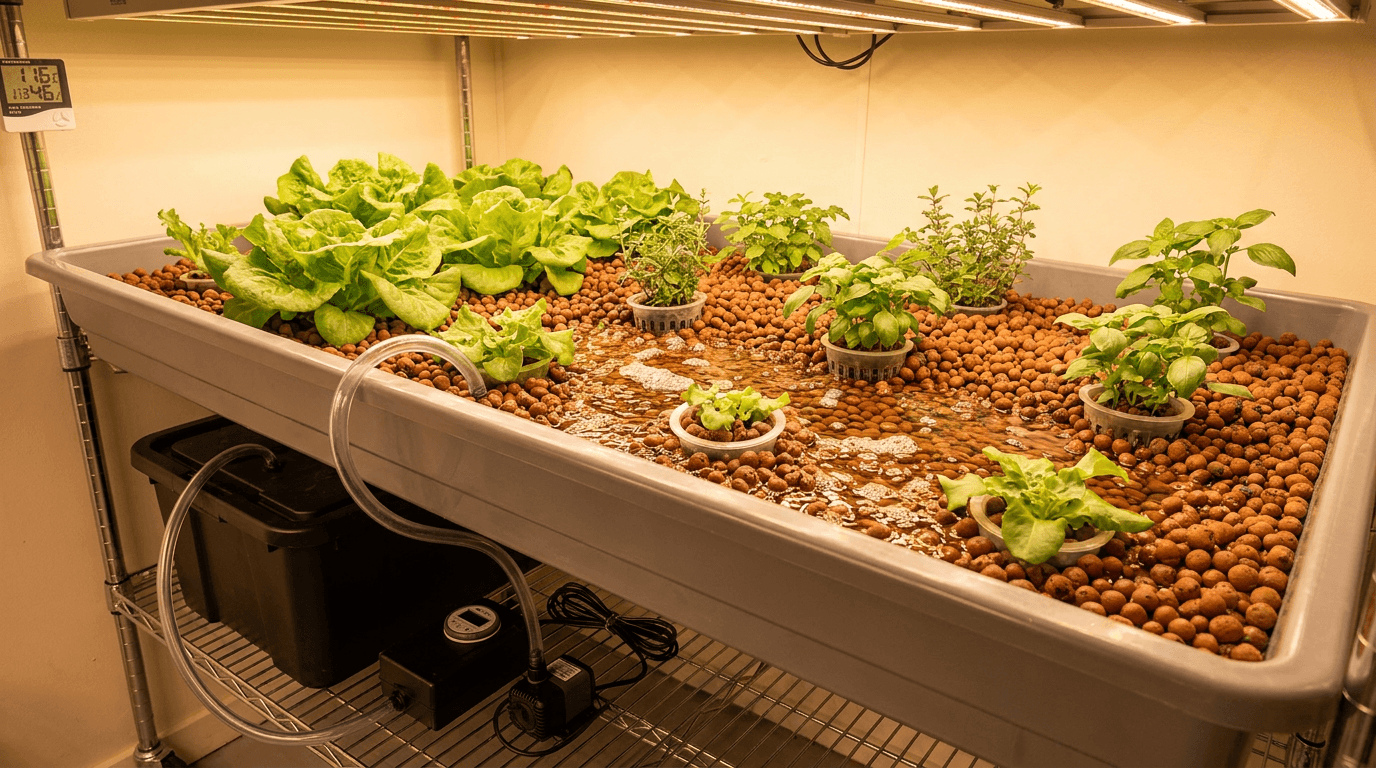
Ebb and Flow Systems: Pros, Cons, and How They Work
Everything you need to know about ebb and flow hydroponic systems: how flood and drain cycles work, the best crops for this versatile method, and a detailed pros and cons analysis backed by real-world testing data from The Hydro Lab.
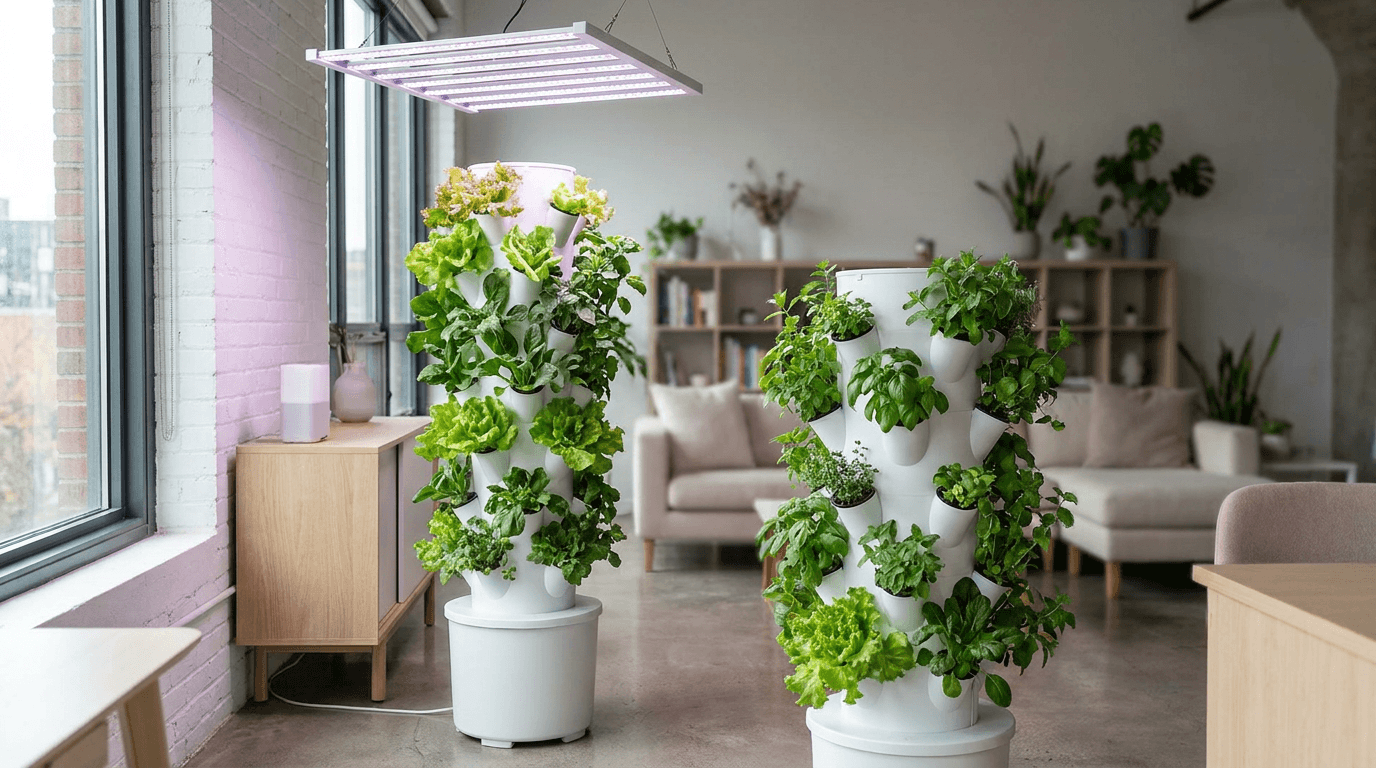
How to Build a Vertical Hydroponic Tower for Small Spaces
Build a space-saving vertical hydroponic tower that grows up to 50 plants in just 2 square feet of floor space. Complete DIY guide with materials list, step-by-step assembly, plant selection tips, and maintenance schedule for small-space growers.
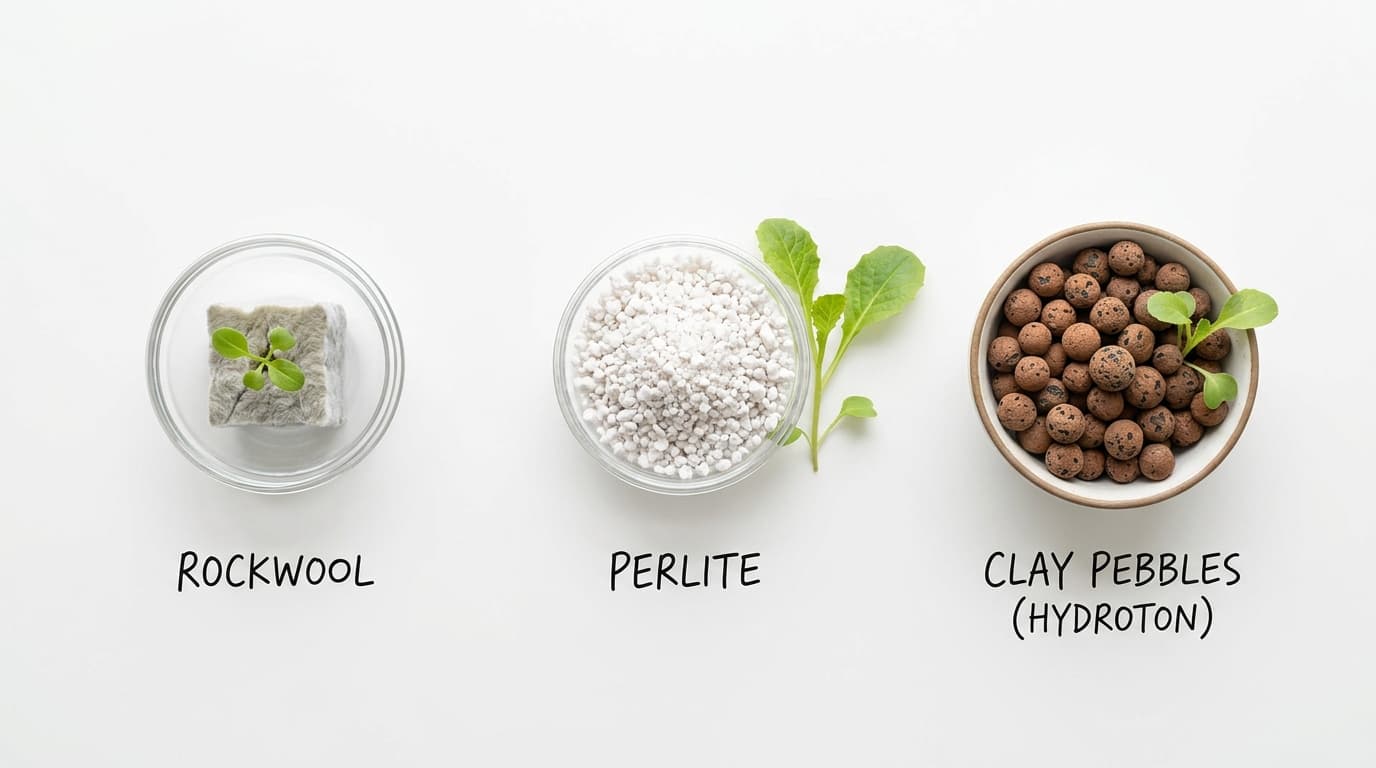
Best Substrates for Hydroponics: Rockwool, Perlite, or Clay Pebbles?
Comprehensive comparison of rockwool, perlite, and clay pebbles for hydroponic systems. Aeration, water retention, pH stability, reusability, cost, and environmental impact analyzed for DWC, NFT, flood-and-drain, and drip growers.